

You can also make placemats and pot mats as well. They make for fabulous original gifts!

So gather up those scraps and let's get started!
You will need:
Fabric scrap strips - approximately 1-1.5cm wide (1/4''-3/4'') in a variety of colours
Rope - no wider than 6mm (1/8'') as it needs to fit under your sewing machine foot

Step 2: Decide whether you are going to do a mixed colour baskets or just blue etc.
Step 3: Put your machine on the zig zag stitch. I have mine set on a 2.5 stitch size. You don't want the stitches to be too small as they need hold the basket together.
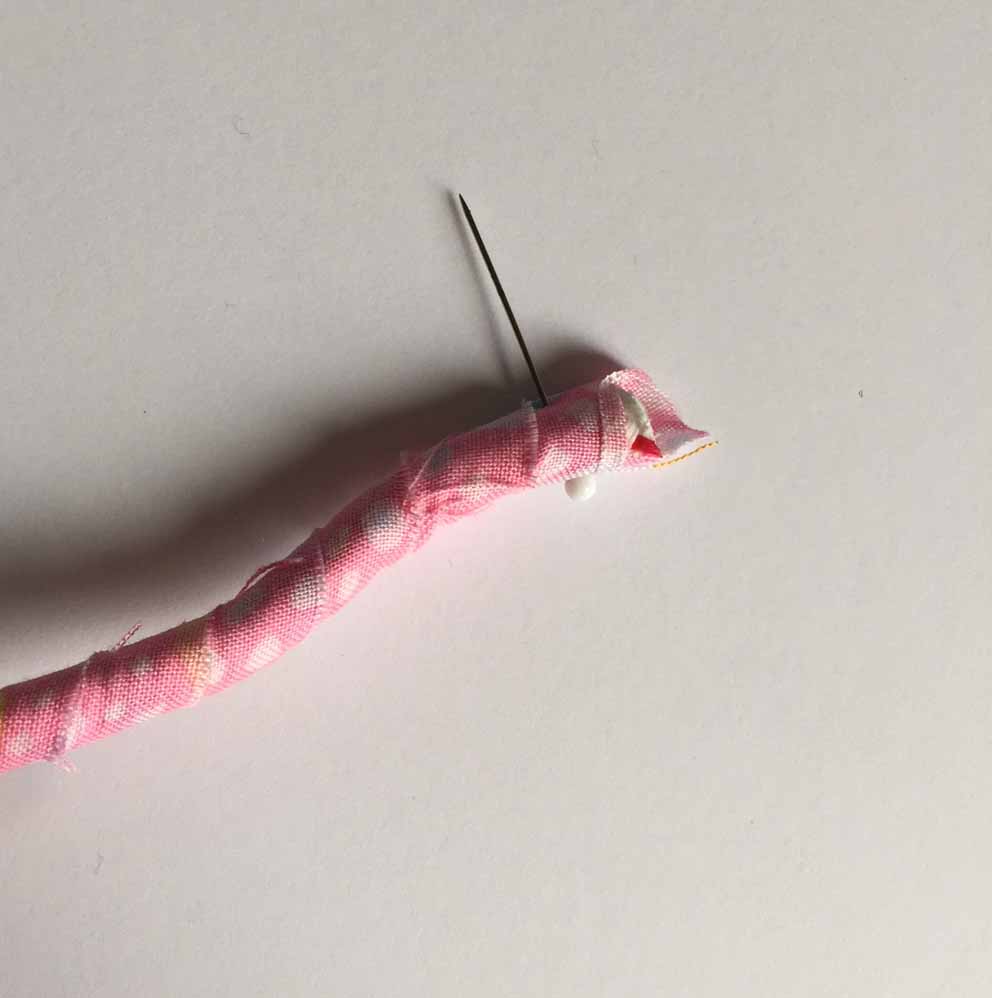
Step 4: Take the end of the rope and your first strip, wrap it twice around the end, pin. Please note I do not cut my rope at this point I cut it at the end when I feel what I'm making is large enough.


If I find I need to wrap more I will do so whilst my project is still in the sewing machine.
Step 5: Take the end and start to wrap into a coil as shown in the photo. Place a pin through it to hold.

Place it under the sewing machine foot, remove the pin and zig zag back and forth to hold.


My base was approximately 14.5cm (6'').


Your left hand will hold the base up and the righthand will continue holding the loose rope close so the machine catches it.


When you decide your sides are high enough cut off the rope, make sure the end is wrapped and covered with fabric, hold it as close to the basket as possible and stitch backwards and forwards to secure it.

Please note: if you run out of wrapped rope in the middle of stitching. Just stop and wrap some more the same way you did in the beginning. I don't even remove my project from the machine. I just stop sewing and start wrapping.
To make placemats or pot mats you start as before following steps 1 to 5. I used about 4m of wrapped rope to create a decent sized pot mat.
Towards the end cut the rope.


Then I stitch a little way to attach is to the rest of the mat.


To make a place mat you will probaby need 8-10m of wrapped rope depending on how large you want it.
When you come to the end just end it off the same way you did the basket. To finish mine off I just randomly stitched some fabrics around the edges.

I would love to hear your thoughts about this and how you go should you decide to make some sweet baskets!
Lastly, I am not an expert basket maker but I thought I'd share how I make mine!
Thanks for reading! Best wishes Rachel
To stay up to date join my mailing list here . You'll receive discounts, news on new products and sales, freebies and tutorials.
Removals Leicestershire
ReplyDeleteRemoval Company Northants
Removal Company Kettering
love this.....what kind of thread did you use?
ReplyDeleteThank you for sharing this vital information with us and assisting us in meeting our goal. You may also go here.. Sanjay Metal India, Stainless Steel Flanges manufacturer, SS Pipe Fittings Manufacturers in India and SS Pipe Fittings Manufacturer
ReplyDeleteDo you use poly solid core rope or clothesline rope? I would like a hop plate table protector. My sister n law just introduced me to this.
ReplyDeleteJust gorgeous and thorough tutorial, thanks very much 😁
ReplyDeleteI have made a couple of these fabric covered rope baskets. I don’t like the fraying fabric. Do you think starching or Elmers glue would keep the fabric smooth and stop the fabric raveling and fraying?
ReplyDeleteI prefer to use bias cut fabrics since there are no edges to fray. My first several I just used bias scraps left from years of bindings...I always have a bit left over and this was the perfect use for them! Now I find myself even cutting 1.25" bias strips from fabric to make the color scheme I want for a particular placemat or rug.
DeleteNice thank you! Do you use 100% cotton rope?
ReplyDeleteI use 1/4" nylon rope from Amazon.
DeleteYour tutorial said to use 1/8" rope / cord so it will fit under the pressure foot. ?? do you use a special foot to make these?
DeleteI would love to try this and appreciate your detailed guidance. Did you use a specific type needle in your machine? Thank you!
ReplyDeleteThis comment has been removed by the author.
ReplyDeleteThis is so fun and addicting! I use glue sticks to add each new strip of fabric. Works great!
ReplyDelete